Key Term: Downlights
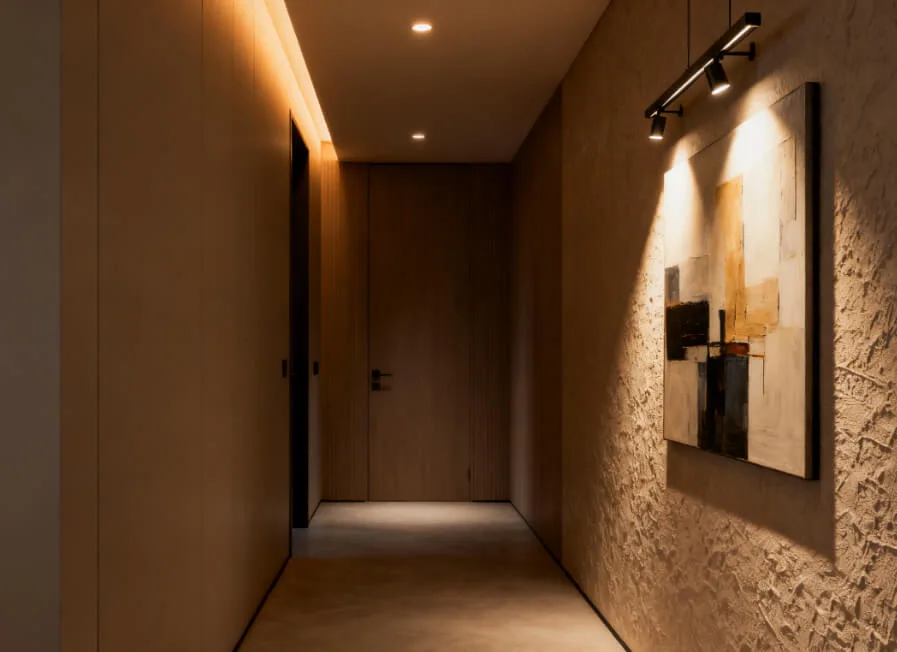
Hotel corridor lighting must prioritize safe passage and long-term durability, avoiding complex features to focus on essential needs. Here are the core principles simplified:
I. Golden Rules for Downlight Selection
-
Moderate Brightness, No Glare
-
Power: 6-8W per light (LED source)
-
Spacing: Install every 2.5-3 meters (7-8 lights for a 20m corridor)
-
Anti-glare design: Choose deep-recessed models (cup depth ≥5cm) to avoid harsh light spots
-
-
Uniform Warm Color Temperature
-
Recommended 3000K warm white (similar to morning sunlight)
-
Avoid: Cold white light (5000K+) – creates sterile ambiance
-
-
Robust Construction for Long Life
-
Housing: Die-cast aluminum (better heat dissipation) > plastic
-
Protection rating: IP44 (dustproof + splash-resistant)
-
LED quality: CRI ≥80 (true color rendering)
-
II. 3-Step Lighting Layout (Visual Guide)
Step 1: Mark Positions Along Centerline
-
Draw a straight line down the center of the corridor (use a laser level for accuracy).
-
Place downlight points every 2.5–3 meters on this line.
-
Critical rule: Keep all downlights ≥60 cm away from side walls to avoid highlighting wall imperfections.
Step 2: Avoid Conflicts with Building Systems
-
Fire sprinklers: No downlights within 50 cm radius.
-
Smoke detectors: Maintain ≥30 cm clearance.
-
AC vents/ducts: Stay ≥80 cm away (heat/cold airflow shortens light lifespan).
-
Tip: Use fluorescent chalk to mark “no-go zones” on the ceiling before drilling.
Step 3: Boost Light in Critical Zones
-
Corners: Add 1 extra downlight per corner (45° angle placement recommended).
-
Room door areas: Focus one downlight directly above door numbers (increase wattage by 20% if possible).
-
Stairs/steps: Install low-level wall lights (0.5m above step nose) paired with the nearest downlight.
III. Critical Installation Details
-
Ceiling Compatibility
Ceiling Type Key Steps Drywall Reinforce with metal brackets after cutting hole Mineral Fiber Use lightweight downlights (≤1kg) Concrete Surface-mounted + concealed conduits -
Wiring Standards
-
Main wire: BV 2.5mm² copper core
-
Connections: Use terminal blocks – no twisting wires
-
Emergency circuit: Separate conduit (red sleeve marking)
-
-
Height & Beam Angle
-
Ceiling ≤3m: 40°-45° beam angle (smooth light blending)
-
Ceiling >3m: 25°-30° beam angle (concentrated floor illumination)
-
IV. Easy Maintenance Guide
| Frequency | Task | Tools |
|---|---|---|
| Monthly | Dust surface | Soft dry cloth |
| Biannually | Check seal integrity | Flashlight |
| If faulty | Replace entire unit (no repairs) | Matching spare |
V. Common Issues & Solutions
Q: Uneven light stripes after installation?
A: Causes & fixes →
① Spacing too wide → Add intermediate light
② Beam angle too narrow → Switch to 60° wide-angle
Q: Dark spots at night?
A: Low-cost solutions →
① Install corner reflector panels (spreads light)
② Paint walls light colors (improves reflectivity)
Q: Lights dim after years?
A: Prevention →
① Choose isolated power drivers (voltage-stable)
② Avoid AC vent paths (heat accelerates decay)